
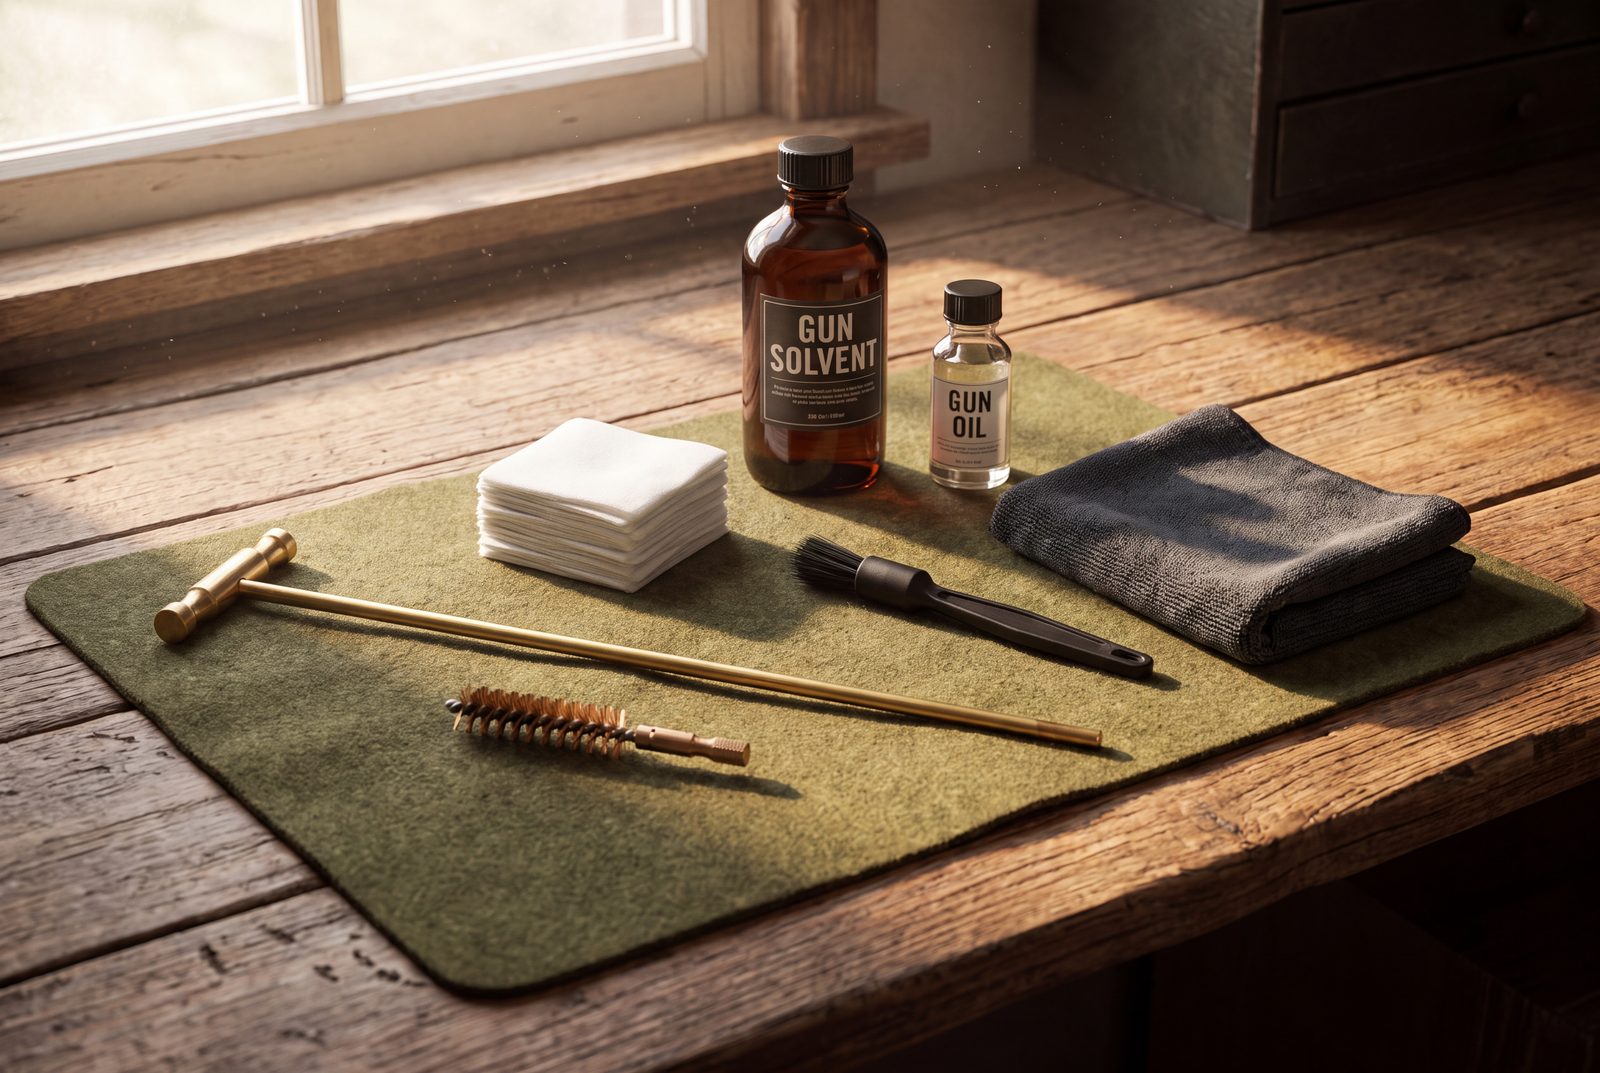
A clean handgun is a reliable handgun. Carbon, unburned powder, and moisture build up every time you shoot, and left alone they cause the two things no shooter wants: malfunctions and premature wear. The good news is that cleaning a pistol is a calm, repeatable routine — once you’ve done it twice, it takes fifteen or twenty minutes and starts to feel almost relaxing.
This guide walks you through it the way a patient instructor would: slowly, safely, and with a reason behind every step. Before we touch a single tool, we start where every cleaning session must start — making the gun safe.
The one rule that outranks all others: Your firearm’s owner’s manual is the final authority. Every model comes apart a little differently. If anything in this guide conflicts with your manufacturer’s instructions, follow the manufacturer.
Safety First: Before You Touch a Single Screw
Cleaning involves pointing, racking, and pulling the trigger on your pistol as part of disassembly. That is exactly why the four universal safety rules stay switched on the entire time — not just at the range.
- Treat every firearm as if it is loaded, even the one you’re sure you just unloaded.
- Keep your finger off the trigger until you have verified the chamber is empty and you’re deliberately performing a takedown step that requires it.
- Never point the muzzle at anything you’re not willing to destroy — pick a safe direction in the room and keep it there.
- Know your target and what’s beyond it. Point at an interior wall that could stop a round, not at a family member on the other side of drywall.
Warning: The single most common cause of a negligent discharge during cleaning is failing to fully clear the gun first. Separate your ammunition from your cleaning area completely — different table, different room if you can. If there’s no ammo where you’re working, a mistake can’t become a tragedy.
What You Need: A Beginner’s Cleaning Kit
You don’t need an expensive setup to start. Pre-assembled kits cover most of this, but here’s what actually earns its place on the bench.
| Item | What it does | Beginner tip |
|---|---|---|
| Cleaning rod or bore snake | Pushes patches/brush through the barrel | A one-piece rod is gentler on the bore than segmented rods |
| Bore brush (correct caliber) | Scrubs carbon and fouling from the rifling | Bronze cuts fouling; nylon is gentler for light jobs |
| Cotton patches | Carry solvent in and pull fouling out | Buy the size matched to your caliber |
| Slotted jag/tip | Holds the patch on the rod | — |
| Gun solvent | Dissolves carbon and copper fouling | Hoppe’s No. 9 is a classic; CLP is an all-in-one option |
| Gun oil / lubricant | Protects metal and reduces friction | A little goes a long way (more on this below) |
| Nylon utility brush | Scrubs the slide, frame, and small parts | An old toothbrush works in a pinch |
| Microfiber cloth / shop towels | Wipes parts down | — |
| Nitrile gloves + eye protection | Keeps solvent and lead residue off skin and out of eyes | Non-negotiable — see the safety section |
Pro Tip: A “CLP” product (Cleaner, Lubricant, Protectant) lets you start with one bottle instead of three. As you get more particular, most shooters graduate to a dedicated solvent and a dedicated oil, because each does its one job better.
Step 1 — Unload and Verify (Do Not Skip This)
This is the most important step in the entire process. Do it slowly and in this order.
- Point the muzzle in a safe direction and keep your finger off the trigger.
- Remove the magazine first. On a semi-auto, if you rack the slide before dropping the magazine, you’ll just feed a fresh round into the chamber — so the magazine always comes out first.
- Lock the slide to the rear (or hold it open) to eject any chambered round.
- Look, then feel. Visually inspect the chamber and magazine well through the ejection port. Then, with the muzzle still pointed safely, physically check the empty chamber with a fingertip. Your eyes can be fooled in poor light; your finger confirms it.
- Set all ammunition and loaded magazines aside, out of the room if possible.
Warning: Do not rely on a single glance. “Look and feel” exists because dim lighting, brass-colored chambers, and simple assumption have caused countless accidents. Verify with two senses, every single time.
For a revolver, the sequence is different: swing out the cylinder (double-action) or remove it (single-action) and confirm every chamber is empty before going further. When in doubt, your manual shows the exact process for your model.
Step 2 — Field Strip Your Pistol
“Field stripping” just means breaking the gun down into its main parts for cleaning — typically the slide, barrel, recoil spring/guide rod, and frame on a semi-auto. It is not a full detail strip, and you should not remove internal components you don’t understand.
Because every design differs, this is the step where your owner’s manual matters most. A striker-fired pistol, a hammer-fired pistol, and a revolver all come apart differently, and some models require you to press the trigger as part of takedown (which is exactly why Step 1 came first).
Pro Tip: The first time you field strip a new pistol, do it with the manual open and your phone recording, or lay the parts out left-to-right in the order they came off. Reassembly is just the same steps in reverse, and a photo of the layout removes all the guesswork.
If the slide won’t move or a takedown lever feels stuck, stop and re-read the manual rather than forcing anything — see the troubleshooting section below.
Step 3 — Clean the Barrel and Bore
The bore is where accuracy and reliability live, so give it the most attention.
- Run a dry patch through first to push out loose debris.
- Wet a patch with solvent and push it through the bore from the breech (chamber) end toward the muzzle whenever your design allows. Cleaning breech-to-muzzle follows the bullet’s direction of travel and protects the crown at the muzzle, which affects accuracy.
- Let the solvent work. Give it a few minutes to dissolve carbon and copper fouling — don’t rush it.
- Attach the bore brush and scrub back and forth through the barrel several times.
- Push clean patches through until a patch comes out nearly clean.
Pro Tip: Push a patch all the way through and let it fall off the far end, rather than dragging a fouled patch back into the clean bore. Chasing a perfectly white patch forever isn’t the goal — “nearly clean, no visible carbon streaks” is the realistic standard for a range gun.
Step 4 — Clean the Slide, Frame, and Chamber
With the barrel soaking or drying, turn to the rest of the gun.
- Use the nylon brush and a little solvent to scrub carbon off the breech face, extractor, and the inside of the slide.
- Clean the slide rails — the metal tracks the slide rides on — since built-up grime here causes sluggish cycling.
- Wipe down the frame rails and the chamber area.
- Finish every surface with a clean cloth so no wet solvent is left pooling on the metal.
Warning: Keep solvent away from any polymer frame areas and finishes your manual flags, and never let solvent soak into a part you can’t fully wipe dry. Leftover wet solvent attracts grime and can affect some coatings.
Step 5 — Lubricate the Right Points (and Only Those)
Here’s the mistake that causes more malfunctions than dirt does: over-oiling. Oil is for the handful of places where metal slides against metal, not a coating for the whole gun. As the old range saying goes, a little oil is better than too much. Excess oil runs into places it shouldn’t, attracts carbon and grit, and turns into a gummy paste.
Apply a thin film — think one drop, wiped to a sheen — to friction points such as:
- The slide rails (the tracks the slide cycles on)
- The barrel’s exterior contact/bearing surfaces
- The guide rod / recoil spring contact area
- Any pivot or wear point your manual specifically calls out
Then wipe the exterior metal with a very lightly oiled cloth to protect against rust, and remove any excess.
Pro Tip: After oiling, hold the slide up to the light and look for shiny wear lines — those bright, polished streaks are exactly where the metal actually rubs, and exactly where the oil belongs. Everywhere else should look dry.
Step 6 — Reassemble and Function Check
Reassemble in the reverse order of your field strip, following your manual. Once the pistol is back together — and with absolutely no ammunition anywhere near you — perform a quick, careful function check:
- Rack the slide and confirm it moves smoothly and returns fully into battery.
- Confirm the slide locks back on an empty magazine (if your model does so).
- Check that the safety and slide stop engage and disengage as designed.
- Rack once more and confirm normal operation.
Warning: A function check is a mechanical test, not a live-fire test. Keep the muzzle in a safe direction and your ammunition in another room throughout. If anything feels gritty, loose, or wrong, re-check your reassembly against the manual before the gun ever goes back into service.
How Often Should You Clean Your Handgun?
There’s no single magic number, but a few practical guidelines cover almost everyone:
| Situation | Suggested action |
|---|---|
| After every range session | Do at least a basic clean and re-lube |
| Carry / home-defense pistol | Clean and inspect regularly even if unfired; pocket lint and sweat accumulate |
| A brand-new gun | Wipe down and lightly lube before first firing (see FAQ) |
| Long-term storage | Clean thoroughly, apply a light protective oil film, and inspect periodically |
| High round counts / dirty ammo | Clean more often — steel-case and some surplus ammo foul faster |
The honest answer: a defensive handgun you rely on deserves more attention than a range toy, and any gun that’s been fired should be cleaned before you trust your life to it again.
Common Beginner Mistakes and Troubleshooting
- “The slide won’t come off.” Don’t force it. Almost always the slide isn’t positioned correctly for takedown or a lever/pin isn’t fully rotated. Re-read your model’s takedown steps.
- Over-oiling. If oil is dripping or you can see it pooling, you used too much. Wipe it back to a thin film.
- Cleaning muzzle-to-breech carelessly. Where your design allows, clean breech-to-muzzle to protect the crown. If you must go the other way, use a muzzle guard.
- Skipping the verify step because “I just unloaded it.” The habit is the safety. Look and feel every time, no exceptions.
- Using random household solvents. Stick to products made for firearms. Improvised chemicals can damage finishes or leave residue that causes malfunctions.
Pro Tip: “How clean is clean enough?” trips up beginners endlessly. For a general-use range pistol, the target is: bore free of visible carbon streaks, breech face and rails wiped down, friction points lightly oiled. You are maintaining a tool, not restoring a museum piece.
Chemical and Lead Safety
Two real hazards live on your cleaning bench: solvent fumes and lead residue. Neither should scare you off, but both deserve respect.
- Ventilation. Gun solvents give off strong fumes. Work in a well-ventilated area with airflow, not a sealed closet.
- Gloves and eyes. Wear nitrile gloves and eye protection. Gloves keep both solvent chemicals and lead residue off your skin.
- Lead hygiene. Firing and cleaning residue can contain lead. Health authorities including CDC/NIOSH advise that you do not eat, drink, or smoke while handling firearms or cleaning residue, and that you wash your hands, forearms, and face thoroughly afterward. Note that ordinary soap-and-water isn’t perfectly effective at removing lead, so wash well and keep contaminated hands away from your face.
- Keep it away from kids and pets. Solvents and oils are toxic. Store them, and the firearm, securely and out of reach of unauthorized persons and children.
Quick-Reference Checklist
- Point in a safe direction; finger off trigger
- Remove magazine → lock slide → look and feel to verify empty
- Move all ammo out of the area
- Field strip per your manual
- Clean bore: dry patch → solvent → brush → patches until nearly clean
- Clean slide, breech face, rails, chamber
- Lubricate friction points with a thin film only
- Reassemble in reverse; function check (no ammo present)
- Wipe exterior with lightly oiled cloth
- Wash hands, forearms, and face; store securely
Cleaning your handgun is one of the most basic responsibilities of ownership, and it’s genuinely satisfying once it becomes routine. Do it safely, do it regularly, and your pistol will reward you with years of reliable service.
Frequently Asked Questions
How often should I clean my handgun?
At minimum, clean it after every range session, and clean any firearm before you rely on it for defense. Carry guns benefit from regular wipe-downs even when unfired, because lint, sweat, and dust accumulate. Frequency also depends on round count and ammo type — dirtier ammunition fouls faster.
Do I need to clean a brand-new gun before shooting it?
Many new pistols ship with a heavy preservative grease from the factory. It’s common practice to wipe the gun down and apply a proper light lubricant before the first range trip. Check your owner’s manual — some manufacturers give specific first-use guidance.
Can you over-oil a gun?
Yes, and it’s one of the most common beginner mistakes. Excess oil migrates where it shouldn’t, attracts carbon and grit, and can cause malfunctions. Oil only the friction points, and only a thin film.
Can I clean my handgun without taking it apart?
You can do a quick “field clean” — running a bore snake through the barrel and wiping accessible surfaces — between deeper cleanings. But a proper cleaning requires at least a basic field strip so you can reach the slide, rails, and chamber. Always follow your manual’s takedown instructions.
What solvent should I use to clean a handgun?
Use products made specifically for firearms — a dedicated bore solvent (such as Hoppe’s No. 9) plus a gun oil, or an all-in-one CLP to start. Avoid improvised household chemicals, which can damage finishes or leave harmful residue.
Is it bad to not clean my gun?
Over time, fouling buildup increases the chance of malfunctions and accelerates wear, and moisture can cause rust or corrosion. A defensive firearm especially should never be neglected — reliability is the whole point.
Which direction should I clean the barrel?
Where your pistol’s design allows, clean from the breech (chamber) end toward the muzzle. This follows the bullet’s path and protects the muzzle crown, which affects accuracy. If you must clean from the muzzle, use a muzzle guard to protect the crown.